
Hello again!
If you’ve read the last several posts detailing the trays that were made and carved last week, you’ll see that today is chapter three for those puppies.
Welcome to the next chapter– firing the bisque kiln.
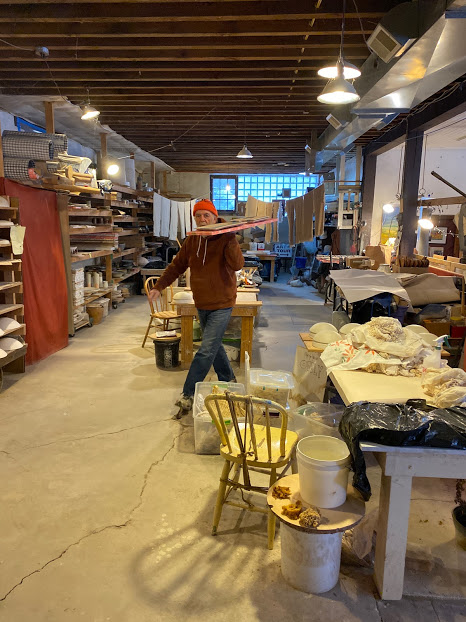

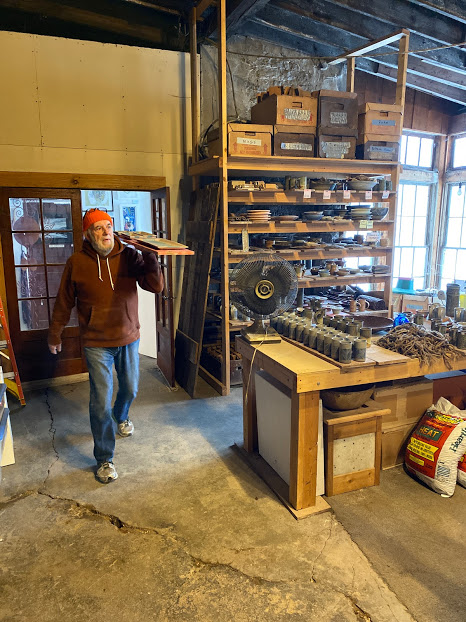
First (above), all the pots are walked, from the pottery studio, across and through the gallery, to the other end of the building where both are kilns are located. For those counting (anyone else?) it’s 40-50 of Tom’s footsteps from the studio to the kiln. So a little hike, not a huge hike.
However, once you’ve carried ware boards from studio to kiln and walked back to get another board and so on and so on and you’ve made 17-18 trips, you’ve walked about one mile. So it adds up, Therefore, totally helpful to wear your best sneaks (don’t forget to wear your winter orange hat to keep warm in the winter).
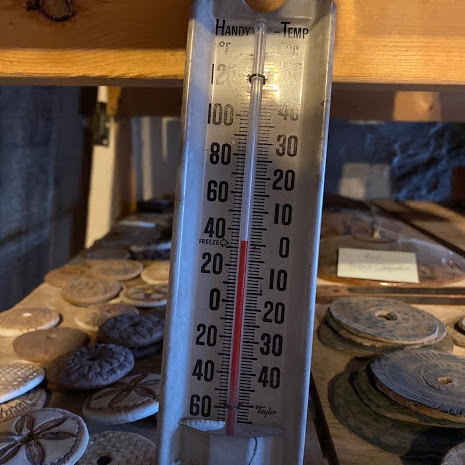
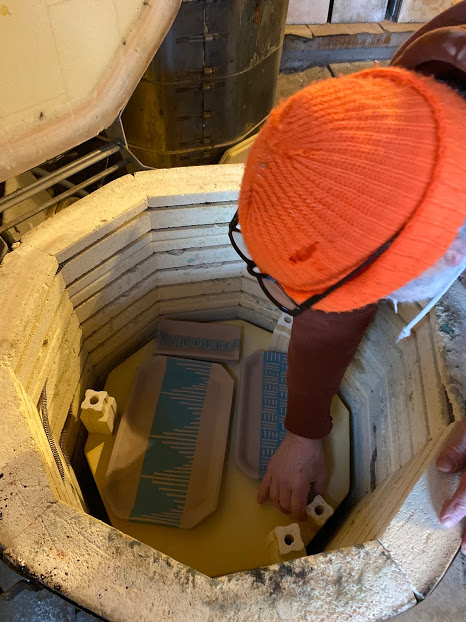
As you can tell by our trusty friend, Mr. “handy temp”, it was a balmy 33º on this day. Just a squeak above freezing and definitely, “put on your orange hat weather”.
Anyway, cold. So yeah.. all the pots are walked over to the kiln room one board at a time and then it’s time to start loading. Depending on what you’re firing, will depend on how long it takes to fire and how many pots are able to be included in that particular firing. Size and shape are a factor. It usually takes about 5 completed bisque kilns to accrue enough pottery to fill our gas kiln for the second, and final, firing. But again, it really depends on what particular pieces we are making.
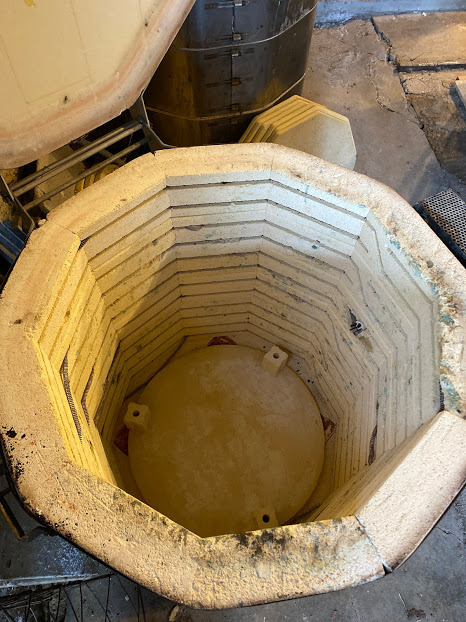
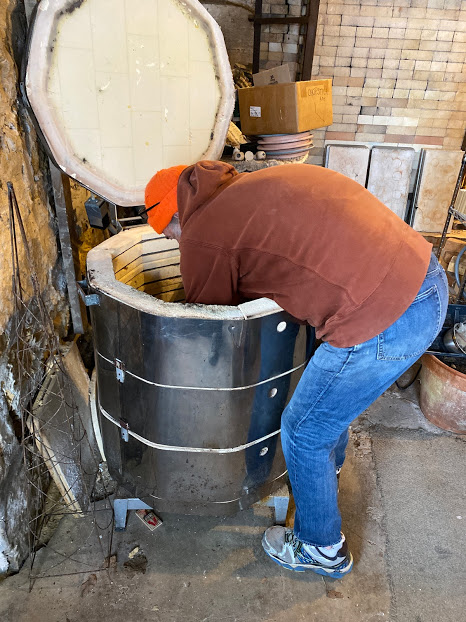
Above, in three tiny first steps: The empty kiln, lid open and ready to be filled. Tom bending over and into the kiln as he sets the first trays on the very bottom. And on the right, the first two trays after they’ve been placed inside.
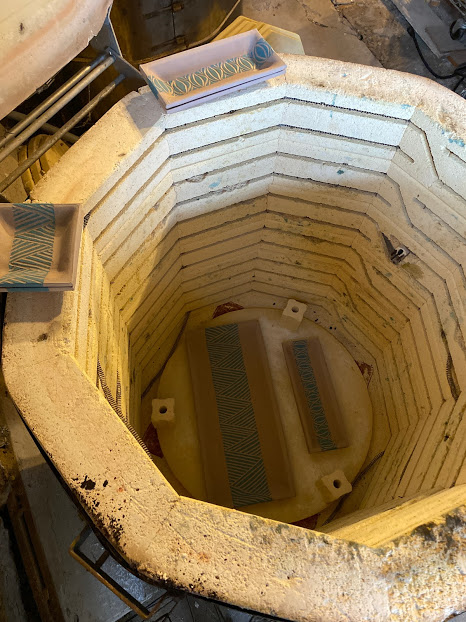
•Get to know the pottery lingo! Stilts. In the photo on the right, you many be wondering what those three tiny white squares around the perimeter are? They’re stilts. We use those to stack the next shelf up on top. They come in various sizes so we can stack the shelves as close together or as far apart as we want to utilize the amount of space and maximize the number of pots we’re able to put inside.
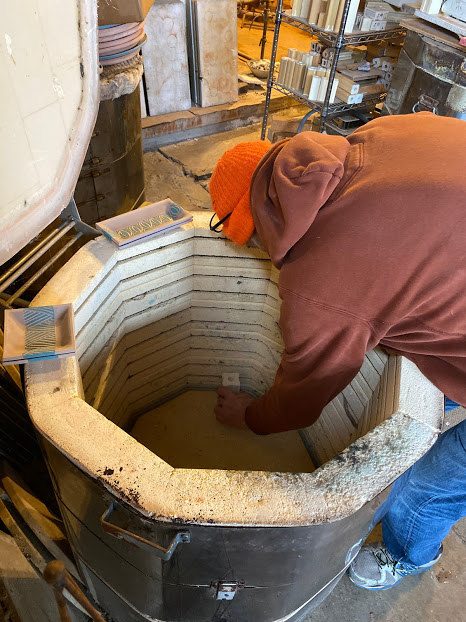
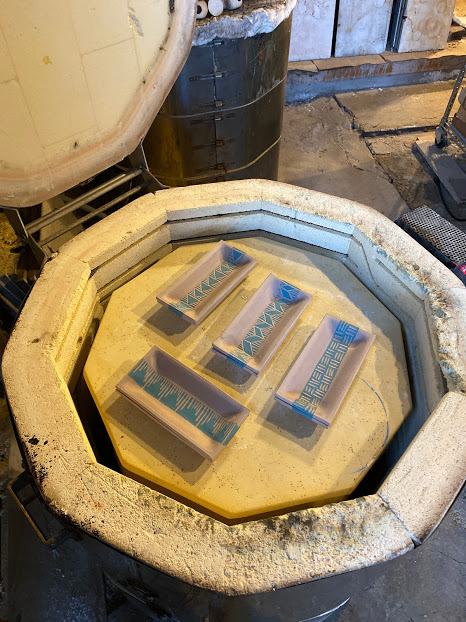
Above, in three more steps: On the left, the next shelf up. Empty, but stacked on top of the stilts on the shelf below. In the middle, Tom places another stilt on the new shelf to begin the process again. On the right, this is actually the next (third if you’re counting) shelf up. Three trays are sitting on the shelf and the stilts are placed, again, around the perimeter to hold the next shelf that will be placed on top.
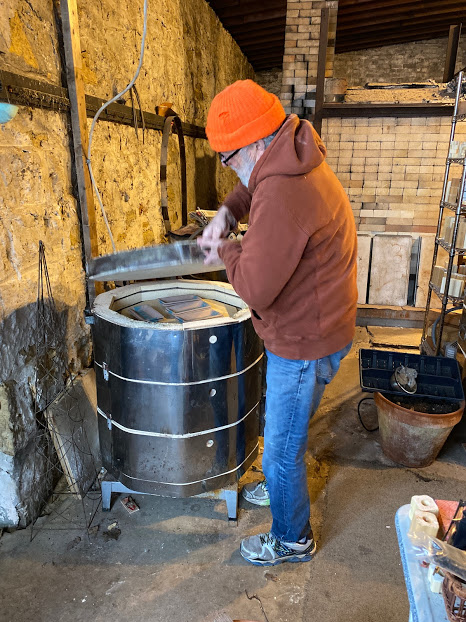
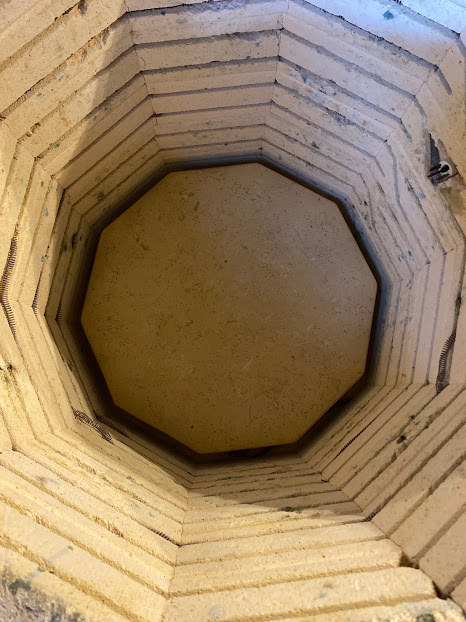
The last few steps (at least for the purposes of this post). On the left, the top and final shelf is shown. In the middle, the lid is closed and it’s time to turn on the kiln. Night night, babies. Behave yourselves and good luck in there! And on the right, probably not the most important part (but also, probably the most important part!) keeping track of what time we do what so we can ensure the kiln is being fired correctly and we’re incrementally turning up the heat at the appropriate times.
Awesome! I love this blog so much!
Best view i have ever seen !